How Chefs Pan-Fry Steak

There’s something timeless about a perfectly pan-seared steak. It’s crispy on the outside, juicy on the inside, and loaded with flavor. While grilling gets a lot of attention, pan-frying steak on the stovetop is one of the fastest, easiest and most flavorful ways to enjoy a great cut of beef.
If you’re ready to master this classic cooking technique, here’s everything you need to know about cooking steak like a pro.
What You Need to Pan-Fry Steak
1. The Right Cut of Meat
The success of your steak starts with your choice of meat: Look for a boneless cut with good marbling (those thin white lines of fat running through the muscle). Marbling is what keeps your steak tender, flavorful and juicy as it cooks.
Ideal thickness? Aim for steaks between 1 and 1.5 inches thick. Thicker steaks often require finishing in the oven, while thinner cuts can easily overcook.
Great cuts for pan-frying include:
-
Ribeye–Richly marbled and packed with flavor.
-
New York Strip–Leaner but still tender and juicy.
-
Top Sirloin–Affordable, beefy and great for quick searing.
-
Filet Mignon–Super-tender, mild in flavor.
Avoid cuts with large bones, or overly thin steaks that can dry out before developing a good sear.
2. Seasoning: Keep It Simple
When it comes to pan-seared steak, salt and pepper are all you really need. A very generous sprinkling of kosher salt and freshly ground black pepper on both sides helps draw out moisture, create a delicious crust and enhance the natural flavor of the beef.
Season right before cooking, or up to an hour ahead if you want to let it rest uncovered in the fridge for extra flavor and surface drying.
3. The Right Cooking Fat
Since pan-searing requires high heat, choose a fat with a high smoke point and a neutral flavor profile. We’re talking avocado, canola, sunflower or soybean oil.
These oils can handle the heat without burning, unlike butter, which smokes at lower temps. That said, you can add butter during the last minute of cooking for flavor. Just don’t sear with it.
4. Optional Aromatics
To take your steak to the next level, toss in some fresh herbs like rosemary or thyme, and maybe a few smashed garlic cloves near the end of cooking. Add these along with a tablespoon of butter for a quick baste that delivers serious depth of flavor.
Choosing the Right Pan
Pan choice matters more than most people think.
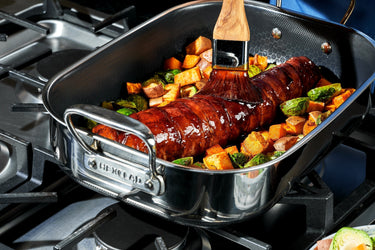
For the perfect pan-seared steak, use a heavy-bottomed skillet that retains and distributes heat evenly. A 12-inch pan gives you enough room to avoid overcrowding, which is crucial for browning. If steaks are too close together, they’ll steam instead of sear.
HexClad’s Hybrid pans are especially well-suited for searing steak. Their combination of stainless-steel peaks and TerraBond™ nonstick valleys gives you the heat retention and searing power of stainless steel, as well as the easy release and effortless cleanup of a nonstick pan. Plus, they handle high temps without warping or sticking.
Step-by-Step: How to Pan-Fry Steak
Step 1: Pat the Steak Dry
Start by using paper towels to blot any surface moisture from the steak. Drying the exterior helps promote the Maillard reaction (a chemical process that occurs when proteins and sugars are exposed to high heat). It’s what gives your steak that savory, caramelized crust.
Moisture interferes with browning and causes splattering. So don’t skip this step!
Step 2: Season Both Sides Liberally
Generously season your steak with salt and pepper. It should look like a bit too much–that’s how you know it’s just right. The seasoning not only enhances flavor, it also contributes to the crust.
Step 3: Preheat Your Pan
Place your skillet on medium-high heat and let it preheat for at least 5 minutes. You want the pan to be hot–not smoking, but close.
Test it by holding your hand a few inches above the surface. You should feel strong, steady heat.
Step 4: Add Oil, Then Steak
Once the pan is hot, add about a tablespoon of oil and swirl to coat. When the oil begins to shimmer or ripple slightly, it’s ready.
Carefully lay your steak in the pan, laying it away from you to avoid splatter. Press it down gently with a spatula or tongs to ensure full contact with the hot surface.
You should hear an instant sizzle. That’s the sound of flavor.
Step 5: Sear Without Moving
Resist the urge to poke, prod or flip your steak too early. Let it sear undisturbed for 3 to 4 minutes on the first side. This ensures a deep, golden crust forms through the Maillard reaction.
When ready, flip and sear the other side for another 3 to 4 minutes. If the steak sticks, it’s not ready; give it another 30 seconds.
Use tongs to hold the steak upright and sear the edges for extra color.
Step 6: Add Butter and Aromatics (Optional)
During the last minute of cooking, add:
-
A tablespoon of butter.
-
A few sprigs of fresh herbs.
-
A crushed fresh garlic clove or two.
Tilt the pan slightly and spoon the melted butter over the steak. This quick basting technique adds richness and depth.
Check Doneness with a Thermometer
The only accurate way to tell if your steak is done is with an instant-read meat thermometer. Insert it into the thickest part of the steak, horizontally from the side, avoiding fat and bone.
Here’s a quick guide to internal temps:
-
Medium-Rare (130–135°F): Juicy and pink inside. Remove at 130°F and rest to reach 135°F. Cook 3-4 minutes per side.
-
Medium (140–145°F): A warm pink center with less juice. Remove at 140°F and rest to reach 145°F.
-
Medium-Well (150–160°F): Slight pink, firm texture. Cook about 4-5 minutes per side.
-
Well-Done (170°F+): Fully cooked through, little to no pink. Not recommended for tender cuts.
The USDA recommends 145°F for safe consumption, which lands in the medium range.
Step 7: Rest Before Slicing
Once it has reached the desired internal temperature, transfer your steak to a plate or cutting board and let it rest for 10 to 20 minutes. This gives the juices time to redistribute throughout the meat, instead of spilling out when you cut into it.
Skipping this step can leave you with a dry steak, even if it was perfectly cooked.
Final Thoughts: Achieve a Perfectly Cooked Steak Like the Pros
When it’s done right, pan-seared steak is hard to beat. It’s fast, flavorful and requires little more than a good cut of meat, a hot pan and a little patience.
If you’re using a HexClad Hybrid skillet, you’re already ahead of the game. Its laser-etched hexagonal design gives you the best of both worlds: stainless-steel searing power plus nonstick convenience.
Whether it’s a weeknight dinner or a special occasion, mastering the pan-sear technique means you can enjoy restaurant-quality steak anytime you want, without ever having to fire up the grill.