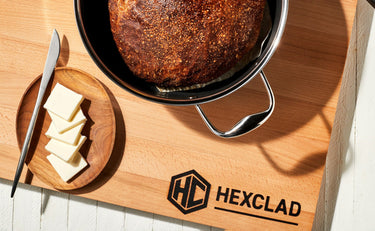
January Cooking Challenge: Become a Sourdough Head

January 2025 is your month to face new cooking challenges, master novel skills and have fun. First up were vegetables. Then, ferments. Now let's talk about conquering sourdough. (TLDR: It's so much easier than you'd think.)
What better way to celebrate the New Year than with a resolution you can actually keep all year long? Nurturing a sourdough starter from its humble beginnings of flour and water into beautiful, bakery-worthy loaves is a rewarding process.
But what if the idea of creating a starter seems too intimidating? Isn’t it super-complicated? We caught up with HexClad contributing food stylist Sandra Tripicchio and her starter, “Doughlene,” for expert tips on how to make a starter from scratch, along with simple steps to create a loaf you’ll love.
With countless guides, cookbooks and websites out there on the subject, it can be overwhelming to know where to begin. The good news? According to Tripicchio, you really can't go wrong as long as you have patience. After diving into resources like King Arthur Flour, Serious Eats, and Tartine Bread, the Tartine Bakery cookbook, even she found the advice on creating and maintaining a starter (not to mention baking the bread) a bit intimidating. To help you skip the stress and get on the path to sourdough success, Sandra shared her top tips for creating any starter and making your own perfect loaf.
A good starter begins with equal parts flour and water—that’s it!
Creating a great starter is surprisingly straightforward, said Tripicchio. “It’s just flour and water and temperature. That’s it.” No matter what starter recipe you’re using, you’ll begin by mixing flour and water in a glass jar—nothing metallic, she cautioned—and covering it to rise at room temperature.
“At first, it’s just a paste,” she said. Feed the starter more flour and water each day to help the yeast and other bacteria naturally present in the flour and air ferment. Once you see bubbles, that’s a good sign, she said.

A rubber band does wonders
Volume is a sign of life in a starter, said Tripicchio. When you begin, mark the level of the starter with a rubber band on the outside of the jar. “As the starter rises above the rubber band, you’ll know that the starter is growing.” Obviously, you’ll want a jar with enough “headroom” for the starter to grow, she added.
Patience is a virtue
When starting your first batch, it’s tempting to imagine slathering homemade bread with butter in a matter of days. “A great starter takes about two weeks to feel like a real thing,” said Tripicchio. Once the mixture smells sour, is bubbly and has risen in volume, it’s ready to bake. From there, you can use the starter to make our classic sourdough loaf (you’ll need a half-cup starter but be sure to weigh it so you can add back equal weights of flour and water) or store the starter in the fridge, where microbial activity slows down.
For laid-back sourdough schedule, refrigerate your starter
While you can store your starter at room temperature, microbial activity speeds up, said Tripicchio. For this reason, she keeps Doughlene in the fridge. When she’s ready to make a loaf, she creates a levain (see below) to "wake up" the culture. If you want to bake straight away, bring the starter to room temperature until it’s bubbly.
Embrace the discard
To maintain the health of your starter, you’ll need to feed it every seven to 12 days. To do this, Tripicchio recommends removing 113 grams of starter. You can compost or throw out the discard, but it’s a rich byproduct you can use for recipes like crackers, banana bread, waffles or pancakes. Tripicchio suggested King Arthur Flour’s collection of sourdough discard recipes, though she often finds the flavor too funky and simply pours it down the drain. Once you’ve discarded, add back 113 grams each flour and water to feed the starter.
For a more flavorful loaf, make a levain
A levain is a secondary starter made from starter, flour and water. Tripicchio mixes equal parts of each and lets it sit out overnight in a covered jar marked with a rubber band. Like the starter, she waits for the levain to double or triple in size before proceeding with her recipe. (If you’re making our classic sourdough loaf, you’ll use the starter directly.)

Take time to hydrate your flours
Our sourdough recipe begins by mixing flour and water before adding the starter—this hydrates the flour, helping it absorb the starter or levain. While you can skip this step, Tripicchio cautions against that, as hydrating flour deepens the flavor and creates a more even dough.
Wait to add any mix ins until just before the final refrigeration
Sourdough is a slow process. You’ll complete three folds of the dough with rests in between before reaching the final overnight rest in the fridge. Tripicchio loves adding mix-ins for flavor but waits until the final fold. If you like a loaf studded with olives, cheese or nuts, add them on the final turn (step 5 in our recipe).
Make sure you use a heavy-duty pot
“The pot is massively important,” Tripicchio stressed. “It’s so important to have something that holds and controls heat, which will set you up for success.” We bake our loaf in our 5-quart Dutch oven, but any heavy-duty, oven-safe large pot with a lid works.
Avoid the dreaded paper bottom with a little trick
Tripicchio’s final tip might seem unusual: lightly coat parchment paper with cooking spray or brush it with olive oil before dusting with rice flour. This keeps the paper from sticking to the loaf as it bakes.
With a little patience and care, you’ll be slicing into your first sourdough loaf in no time.


