How to Clean Nonstick Pans Properly
Whether you're a seasoned kitchen vet who sautés with flair or someone who just needs a reliable skillet for scrambling eggs, a nonstick pan is the unsung hero of your stovetop.
It’s probably the pan you reach for first–and the one that’s always in your sink, because it just pulled breakfast duty again. It’s seen you through Sunday pancakes, late-night grilled cheeses and maybe even your first attempt at a French omelet. (Brave!)
So these are the pans you’re going to want to keep around as long as possible. And we’ve got all the simple tips to help you extend your favorite nonstick pan’s shelf life.
Why Cleaning Nonstick Pans the Right Way Matters
There are a couple of reasons you’ll want to learn the proper care for your nonstick pan: For one, it helps to preserve the nonstick surface’s performance. (No stuck-on food or grime here!) It also helps you avoid health risks produced by warped surfaces or scratched coatings. And lastly, it saves time and effort in the long run. Because who has extra minutes to spare these days?
Everyday Cleaning: Keep It Simple, Silly
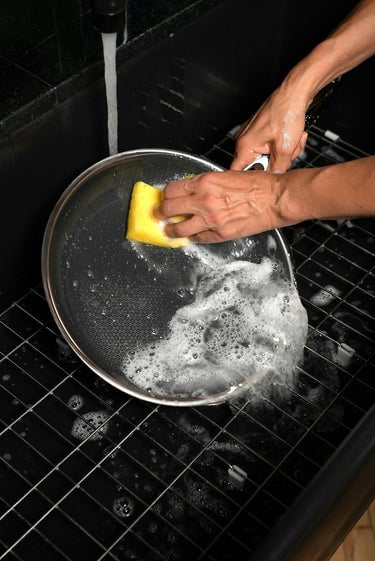
The beauty of nonstick pans is that they require very little effort for everyday cleanup: Simply rinse with hot water, a mild soap and rub with a soft sponge after each use. That’s it. That’s the plan. But there are some preventative tips to keep in mind, too. Here are a few bonus pointers on regular proper care.
Use the Right Utensils
We get it–sometimes you reach for the metal spatula without thinking. But if you want your nonstick coating to last, stick with silicone wood, or plastic utensils. They’re gentler and won’t scratch the surface over time. (Although, bonus: HexClad Hybrid pans are metal utensil–safe, so you don’t have to worry about this one.)
Skip the Cooking Spray
It sounds counterintuitive, but aerosol cooking sprays (especially the kind with lecithin) can leave behind a residue that’s tough to clean. Stick with a light drizzle of oil instead, and wipe away any excess when you’re done cooking.
Let Your Pan Cool Before Washing
Plunging a hot pan into cold water can warp the base or damage the coating over time. Let it cool naturally before washing it with warm soapy water. Your pan will thank you.
At-Home Fixes For for Burnt & Baked-On Stains
Traditionally, chemical coatings are responsible for creating a nonstick surface by acting as a barrier to keep food particles from binding with molecules in the pan’s metal. But if your eggs are clinging on for dear life, it’s not because your pan is judging you. It’s because grease and residue from oil or food particles build up over time, forming a stubborn film that messes with your pan’s smooth surface.
This gunky layer gets baked on, especially if you’re using fats like vegetable, canola or olive oil. That buildup can throw off the delicate balance that makes a nonstick pan, well, not sticky. Even high-end nonstick coatings aren’t immune.
If your nonstick pan is suddenly…sitckier than usual, it’s easy to bring it back from the brink in five seriously simple steps. You’ll need nothing more than vinegar, baking soda, water and 15 minutes. You’ve got this.
Step 1: Mix One Part Vinegar With Two Parts Water
We know: Vinegar smells a little like gym socks. But it’s one of the most effective natural cleaners around. Why? Because it’s acidic enough to cut through grease, dissolve gunk and leave your pan looking way closer to new.
Simply combine 1 cup of water with ½ cup of white vinegar. That’s it. No caustic chemicals, no complicated ratios. Just pantry basics doing what they do best.
Step 2: Pour the Mixture Into the Pan and Boil It
Pour your vinegar-water mix into the pan and turn up the heat. Let it come to a boil, then reduce the heat and let it simmer for about 10 minutes.
This part does two things: First, it heats up the residue that’s caked onto the surface and secondly, it allows the vinegar to work its way into all the little spots where grease has made itself at home.
Yes, it might smell a bit intense for a few minutes. Open a window. It’ll be worth it.
Step 3: Dump It Out and Wipe It Down
After 10 minutes, turn off the heat and pour out the mixture (carefully, please, because this stuff is still hot!).
Then take a clean cloth or a sturdy paper towel and wipe down the pan. At this point, a lot of the grime should come off pretty easily. You might even see some of that cooked-on grease peeling away like it’s quitting its job.
Step 4: Scrub With Baking Soda
This is the secret sauce (minus the actual sauce). Baking soda is mildly abrasive, which means it can help break down leftover residue without damaging your nonstick surface. It’s also a base, so it reacts with any lingering acids or stuck-on bits. Consider it a pan detox.
Sprinkle a generous amount of baking soda directly onto the surface of the pan. Then take a soft sponge (not steel wool, not a scouring pad–keep it gentle!) and scrub in circular motions. Hit every corner. Show your pan some love.
Step 5: Rinse, Dry and Marvel at Your Work
Once you’ve scrubbed the surface thoroughly, rinse the pan with warm water and give it a once-over with dish soap and a soft sponge.
Dry it completely (don’t skip this step!) and just like that, you’ve brought your pan back from the brink.
Place it on your pot rack or stovetop and admire it for a second. You did that.
What’s Different About Cleaning HexClad Pans?
HexClad pans give you all the benefits of nonstick cooking–especially when it comes to cleanup. While you can give them a good clean by simply hand-washing them in warm, soapy water, our Hybrid pans are dishwasher-safe, a bonus for when you’re at your cleaning limit. If you’ve got heavy-duty stains (look, it happens), soak the pan for 10 to 15 minutes before cleaning. Oh, and did we mention that our Hybrid design also allows occasional metal utensil use, unlike traditional nonstick? Bonus.
Want to learn more? Here’s some info about seasoning your nonstick pan.