These Tips Make Frosting A Cake So Much Easier
If you’ve watched an episode of the Great British Bake-Off and imagined yourself entering the competition, you wouldn’t be alone. Or perhaps you just want to make a great cake for your kid’s birthday party. The reasons for baking a cake are endless, and making one cake from scratch can be not just validating but empowering. Unfortunately, frosting said cake can be both bewildering and perhaps a little depressing. Fears about adding the final touches to a cake can be daunting. Will it be too messy or uneven? Or perhaps, the mistakes will be more visible than the successes?
If you’re someone who is nervous about frosting cakes, don’t worry! You’re not alone. Thankfully, there are a few things to make frosting a cake easy and less stressful, whether you’ve whipped up a batch of buttercream or cream cheese frosting.
First, it’s helpful to get your toolkit together and keep them handy once you’re ready to start decorating.
7 helpful tools for frosting a cake
- Parchment paper strips: Prevent messes on your cake stand or serving platter by placing parchment paper strips under the cake before frosting. Once you’re done decorating, carefully slide out the strips and discard.
- Cake lifter or large, sturdy spatula: Transferring a frosted cake from the cake turntable to the serving platter can be a daunting task. Using a cake lifter (a large piece of metal that can fit under the entire cake) can help you transport the cake safely.
- Serrated knife or a cake leveler: Domed tops or uneven textures are normal. Slice the tops with a serrated knife or use a dedicated cake leveler to create even layers, which will make the cake easier to stack and frost. (The best way to get even cake layers is to weigh the batter when filling the cake pans, that way they’ll turn out similar in size.)
- Bench scraper: To achieve the smooth sides and clean edges of a professional-quality cake, use the edge of a bench scraper, which removes excess frosting and—when combined with a rotating turntable—can create perfectly smooth sides.
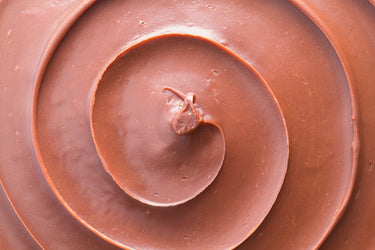
- Pastry bags with fitted tips: To decorate with melted chocolate, colored frosting, or piping gel, keep a pastry bag on hand and add a fitted tip. You can also use a resealable plastic bag, instead. Just cut off a small piece of one corner and use as you would a pastry bag.
- Offset spatula: This must-have tool for frosting cakes has a long, thin blade that helps spread frosting evenly. It’s curved tip allows you to get into hard-to-reach places while the wide, flat blade helps achieve a smooth, even finish.
- Cake turntable: A cake turntable is a rotating platform that makes it easier to frost a cake evenly, since you can rotate it as you frost.
Steps for frosting a cake:
Though you can bake, cool, and frost your cake in one day, it pays to plan ahead when you’re starting out so you can focus fully on frosting. Bake the cakes a day in advance and wrap well in plastic wrap. Store at room temperature. Or, wrap well in plastic wrap, freeze for up to 1 month, and defrost fully before frosting.
- Bake and cool your cakes: For the best results, allow the layers to cool fully before frosting. If you bake the cakes a day in advance, wrap them well with plastic wrap so they don’t dry out.
- Make the frosting: The day of assembly, make the frosting. If you refrigerate, bring it back to room temperature before frosting.
- Get your tools ready and prep the layers: Trim layers as needed and get your toolkit together for easy frosting.
- Place the cake layers on the stand: Put a dab of frosting on the cake stand, then place the first cake layer on top of the dab of frosting. Slide a few strips of parchment paper underneath. Spread the bottom layer with frosting, then top with a second layer.
- Apply a crumb coat: To keep crumbs from wiggling their way into the final, frosted cake, apply a thin layer of frosting known as a crumb coat. Chill the cake for 15 minutes.
- Finish frosting: Top the cake with a generous amount of frosting, then spread it just beyond the edge of the cake. Frost the sides of the cake. Use a piping bag to add any melted chocolate, colored frosting, or piping gel.
The best news about getting better at cake decorating is that it’s delicious and fun! Don’t worry too much about imperfections—they can always be covered up with sprinkles or edible decorations.


